 Merken
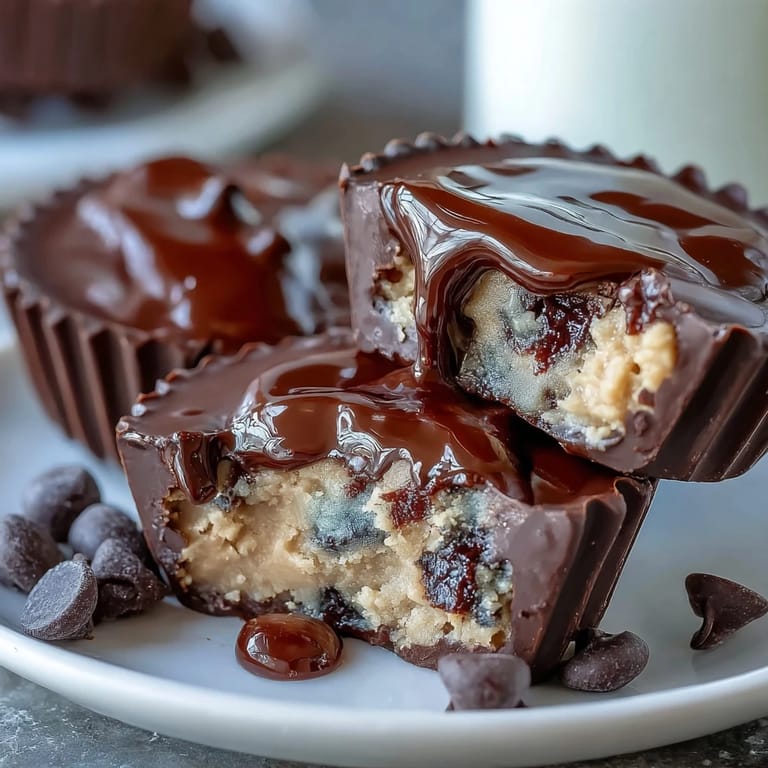
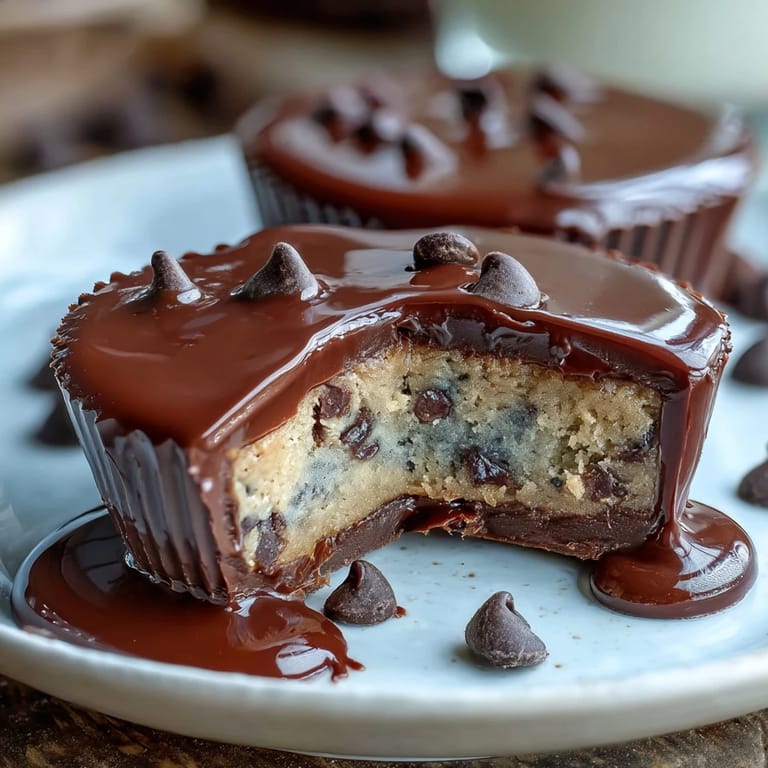
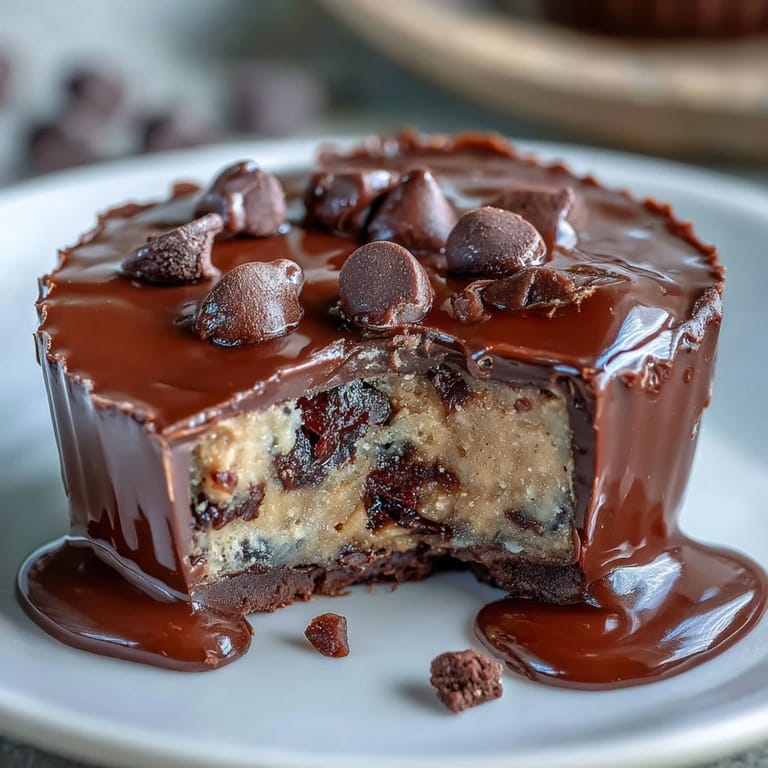
 My neighbor handed me one of these across the fence on a Saturday afternoon, still cool from her freezer, and I bit into it expecting just another peanut butter cup. Instead, there was this surprise of raw cookie dough studded with chocolate chips, and I nearly dropped it mid-chew. She'd combined two things I thought couldn't possibly improve, yet somehow they did, and I spent the next week trying to reverse-engineer her recipe through increasingly desperate texts. Now I make them constantly, partly because they're genuinely addictive, but mostly because watching someone's face light up when they taste that first layer of cookie dough never gets old.
I made a batch for my book club and one woman literally went silent mid-sentence when she tasted it, just stared at the cup in her hand like it had betrayed her expectations in the best way. That moment taught me these aren't just candy, they're conversation stoppers in the most satisfying way possible.
Ingredients
- Unsalted butter (1/4 cup softened, plus 2 tbsp melted): The softened butter creams beautifully with the sugars for that light, fluffy cookie dough texture.
- Light brown sugar and granulated sugar (1/4 cup plus 2 tbsp combined): Brown sugar brings moisture and depth while granulated sugar keeps things from getting too dense.
- Vanilla extract (1/2 tsp): Just enough to make you wonder what that familiar warmth is without tasting overtly vanilla.
- Milk (1 tbsp): This tiny amount loosens the dough so it spreads without becoming greasy.
- Heat-treated all-purpose flour (1/2 cup): This is non-negotiable because you're eating raw dough, so the flour must be treated to eliminate any food safety concerns.
- Mini chocolate chips (1/3 cup): Mini chips distribute flavor better than chunky ones and won't overpower the delicate cookie dough.
- Creamy peanut butter (1/2 cup): Don't use the natural kind unless you're okay with separated oil, the commercial stuff stays smooth and creamy here.
- Powdered sugar (1/4 cup): This sweetens the peanut butter layer while keeping it firm enough to hold its shape.
- Semisweet or milk chocolate chips (2 cups): This is your choice depending on mood, semisweet is classic but milk chocolate is silkier if you like that.
- Coconut oil or vegetable oil (2 tsp): Just a touch makes the chocolate flow like silk without affecting the flavor.
Tired of Takeout? 🥡
Get 10 meals you can make faster than delivery arrives. Seriously.
One email. No spam. Unsubscribe anytime.
Instructions
- Heat treat your flour first:
- Microwave the flour on high for 1 minute, stirring halfway through, or pop it in a 350°F oven for 5 minutes and let it cool completely. This step sounds fussy but it's the only thing between you and potential foodborne illness with the raw dough, so don't skip it.
- Cream the butter and sugars:
- Beat them together until the mixture looks light and fluffy, like pale sand, which takes about 2 minutes with an electric mixer. This is where air gets incorporated, making the final cookie dough tender instead of dense.
- Build the cookie dough:
- Stir in the vanilla and milk, then fold in the cooled flour and salt with a spatula, being gentle so you don't develop gluten. When it looks almost combined, fold in the mini chocolate chips and set the whole thing in the fridge.
- Line your muffin tin:
- Slip paper liners into a standard 12-cup muffin tin and set it on the counter, because you'll be working with warm chocolate soon and you want to move fast.
- Melt chocolate with intention:
- Combine chocolate chips and coconut oil in a microwave-safe bowl, then heat in 30-second bursts, stirring between each one until everything is glossy and smooth. This gentle approach prevents scorching, which makes chocolate grainy and bitter.
- Coat the bottom of each cup:
- Spoon about 1 tablespoon of melted chocolate into each liner and use the back of the spoon or a small offset spatula to coat the bottom evenly. Pop the whole tin in the freezer for exactly 10 minutes so the chocolate sets but stays pliable.
- Mix the peanut butter layer:
- While that's freezing, stir together the peanut butter, melted butter, powdered sugar, and salt until you have a smooth paste with no lumps. This layer is what holds everything together structurally and flavor-wise.
- Add the peanut butter:
- Remove the muffin tin from the freezer and drop a generous teaspoon of peanut butter mixture onto each chocolate base, then use your finger or the back of the spoon to flatten it gently into an even layer. It won't cover the whole cup and that's correct.
- Place the cookie dough:
- Scoop about 1 teaspoon of the chilled cookie dough and press it firmly but gently onto the peanut butter layer in each cup, leaving a tiny rim of peanut butter visible around the edges. The cookie dough should feel slightly cold and compact.
- Seal with chocolate:
- Top each cup with enough melted chocolate to completely cover all the fillings, then use a small spoon to smooth the tops so they look intentional and not chaotic. Work relatively quickly because the chocolate will start to thicken.
- Final chill:
- Pop the whole tin into the fridge or freezer for at least 20 minutes until the chocolate coating feels completely firm to the touch. You can eat them straight from the fridge or let them sit at room temperature for 2 minutes for a slightly softer texture.
 Merken
 There's something deeply satisfying about unwrapping the paper liner and having these three distinct layers come apart cleanly in your mouth. I made them once for a friend going through a rough time and she texted me a week later saying she'd hidden a batch in her freezer and kept sneaking one when she needed a moment to herself, which felt like the highest compliment I could receive.
The Truth About Store-Bought Cookie Dough
I've tried shortcuts with store-bought edible cookie dough and it never quite works the same way. The texture is off, sometimes too soft or too sweet, and you lose that pride that comes from making every layer yourself. Homemade cookie dough also tastes fresher and you control exactly how sweet it is, which matters when it's sitting next to chocolate and peanut butter that are already doing their own sweetness thing.
Why Coconut Oil Changes Everything
That tiny amount of coconut oil mixed into the melted chocolate does something almost magical. It doesn't impart coconut flavor, it just makes the chocolate more fluid and silky, so it sets with a delicate snap rather than that thick, waxy feeling you get with straight chocolate. I learned this the hard way after my first batch had chocolate coatings that were oddly stiff.
Storage and Flavor Development
These cups actually taste better on day two or three after the layers have had time to marry and set up completely. Keep them in an airtight container in the refrigerator and they'll stay perfect for about a week, though honestly they rarely last that long in my house.
- If you want them slightly less firm, let them sit at room temperature for 5 minutes before eating.
- For gifting, stack them in a paper-lined box and tie with ribbon for something that looks handmade and intentional.
- You can also freeze them for up to a month if you want to make a big batch and ration yourself.
 Merken
 These really are one of those recipes that feels like you're sharing a secret when you make them for someone. They take barely any time, look impossibly fancy, and taste like you spent way more effort than you actually did.
Fragen und Antworten zum Rezept
- → Wie wird der Keksteig eifrei sicher gemacht?
Der Keksteig wird durch Wärmebehandlung des Mehls entweder im Mikrowellenherd oder Backofen hergestellt, um mögliche Keime zu eliminieren.
- → Kann ich vegane Milchalternativen verwenden?
Ja, Mandel- oder Hafermilch eignen sich hervorragend als Ersatz für Kuhmilch in der Keksfüllung.
- → Wie verhindere ich, dass die Schokolade matt wird?
Durch mehrmaliges sanftes Erhitzen und sofortiges Abkühlen sorgt man für eine geschmeidige, glänzende Schicht.
- → Wie lange sollten die Cups kühlen, bis sie fest sind?
Mindestens 20 Minuten im Kühlschrank oder Gefrierfach gewährleisten eine stabile Konsistenz.
- → Welche Schokoladensorte eignet sich am besten?
Halbbitterschokolade ergibt ein ausgewogenes Aroma, dunkle Schokolade intensiviert den Geschmack, Milchschokolade macht sie besonders cremig.